Building a Virtual Private Cloud (VPC) network using Raspberry Pi is an excellent way to enhance your networking skills while creating a robust, secure environment for your IoT devices or home server setup. Whether you're a hobbyist or a professional looking to experiment with cloud infrastructure, this tutorial will walk you through every step of the process.
Raspberry Pi has become a go-to device for developers and enthusiasts worldwide due to its versatility and affordability. By leveraging its capabilities, you can create a VPC network tailored to your specific needs, ensuring seamless communication between devices while maintaining top-notch security. This guide will help you understand the fundamentals of VPC networks and provide practical steps to implement them using Raspberry Pi.
As we delve deeper into this Raspberry Pi VPC network tutorial, you'll gain insights into essential networking concepts, configuration steps, and best practices. By the end of this article, you'll have the confidence to build your own VPC network and optimize it for various use cases.
Read also:Is Sandra Bullock A Man Unveiling The Truth Behind The Rumors
Table of Contents
- Introduction to VPC Networks
- Raspberry Pi Overview
- Hardware Requirements
- Software Setup
- Network Architecture
- Setting Up the VPC
- Securing Your VPC
- Troubleshooting Common Issues
- Advanced Features and Optimization
- Conclusion
Introduction to VPC Networks
What is a VPC Network?
A Virtual Private Cloud (VPC) network is a logically isolated segment of the cloud where you can launch and manage your resources securely. It allows you to define subnets, route tables, and security groups to control access and communication between devices. In simpler terms, a VPC acts as a private network within the cloud, offering enhanced security and flexibility for your infrastructure.
Why Use Raspberry Pi for VPC?
Raspberry Pi serves as an affordable and efficient platform for experimenting with VPC networks. Its compact size, low power consumption, and compatibility with various operating systems make it ideal for setting up a VPC at home or in small-scale environments. Additionally, Raspberry Pi provides a hands-on learning experience for those interested in networking and cloud technologies.
Benefits of a Raspberry Pi VPC Network
- Cost-effective solution for home networking
- Enhanced security through private subnets
- Customizable architecture for diverse use cases
- Opportunity to learn advanced networking concepts
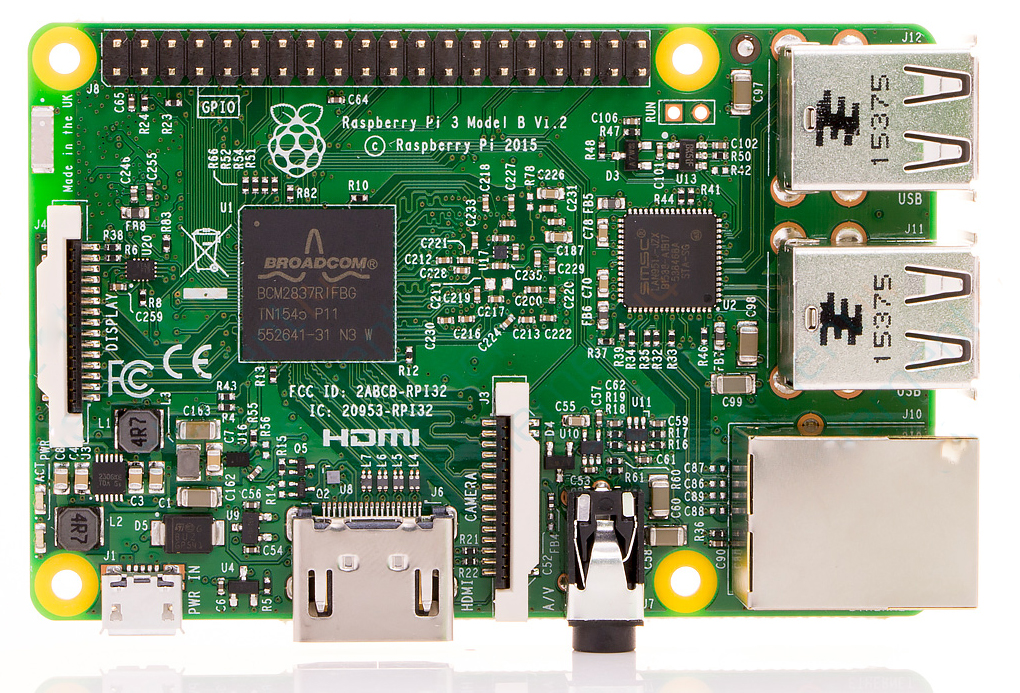
Raspberry Pi Overview
Raspberry Pi is a series of single-board computers designed to promote the teaching of basic computer science in schools and developing countries. Over the years, it has evolved into a versatile tool used by hobbyists, educators, and professionals alike. The latest models, such as Raspberry Pi 4, offer impressive performance and support for modern operating systems, making them suitable for advanced projects like setting up a VPC network.
Key Features of Raspberry Pi
- Compact form factor
- Multiple USB ports for peripheral connectivity
- Gigabit Ethernet for reliable networking
- Support for Wi-Fi and Bluetooth
- Compatibility with Linux-based operating systems
Hardware Requirements
Before diving into the Raspberry Pi VPC network tutorial, ensure you have the necessary hardware components:
- Raspberry Pi (Model 3 or 4 recommended)
- MicroSD card with a minimum of 16GB
- Power supply with sufficient wattage
- Ethernet cable or Wi-Fi adapter
- HDMI monitor and keyboard (optional, for initial setup)
Software Setup
Choosing the Right Operating System
For this Raspberry Pi VPC network tutorial, we recommend using a lightweight Linux distribution such as Raspberry Pi OS or Ubuntu Server. These operating systems provide the necessary tools and utilities for setting up and managing a VPC network.
Installing the Operating System
Follow these steps to install the chosen operating system on your Raspberry Pi:
Read also:Andrea Brillantes Scandal Video Unveiling The Truth And Setting The Record Straight
- Download the latest image of the operating system from the official website.
- Use a tool like Raspberry Pi Imager or Etcher to write the image to your MicroSD card.
- Insert the MicroSD card into your Raspberry Pi and power it on.
- Complete the initial setup process, including configuring Wi-Fi and setting up a username/password.
Network Architecture
Designing a robust network architecture is crucial for the success of your Raspberry Pi VPC network. Consider the following components:
- Subnets: Divide your network into smaller segments to improve security and performance.
- Router: Use a dedicated router or configure Raspberry Pi as a router to manage traffic between subnets.
- Firewall: Implement a firewall to restrict unauthorized access and protect your network.
Setting Up the VPC
Step 1: Configure Network Interfaces
Edit the network configuration file to define your subnets and IP addresses:
- Open the terminal and navigate to the network configuration file:
/etc/network/interfaces. - Add the following lines to define your subnets:
Example:
auto eth0iface eth0 inet staticaddress 192.168.1.1netmask 255.255.255.0
Step 2: Enable IP Forwarding
Allow your Raspberry Pi to forward traffic between subnets by enabling IP forwarding:
- Edit the
/etc/sysctl.conffile and uncomment the line:net.ipv4.ip_forward=1. - Apply the changes by running:
sudo sysctl -p.
Step 3: Configure NAT
Set up Network Address Translation (NAT) to allow devices in your VPC to access the internet:
- Open the terminal and run:
sudo iptables -t nat -A POSTROUTING -o eth0 -j MASQUERADE. - Save the iptables rules to make them persistent:
sudo sh -c "iptables-save > /etc/iptables/rules.v4".
Securing Your VPC
Implementing a Firewall
Enhance the security of your Raspberry Pi VPC network by configuring a firewall:
- Install UFW (Uncomplicated Firewall):
sudo apt install ufw. - Allow specific ports and protocols:
sudo ufw allow ssh,sudo ufw allow http. - Enable the firewall:
sudo ufw enable.
Using Strong Passwords and Authentication
Ensure all devices and services in your VPC are protected with strong passwords. Additionally, consider implementing two-factor authentication (2FA) for added security.
Troubleshooting Common Issues
Encountering issues during the setup process is normal. Here are some common problems and their solutions:
- No Internet Connectivity: Verify your network configuration and ensure IP forwarding is enabled.
- SSH Access Denied: Check your firewall rules and ensure the SSH service is running.
- Device Not Recognized: Ensure all hardware components are properly connected and compatible with Raspberry Pi.
Advanced Features and Optimization
Setting Up a DNS Server
Configure a DNS server on your Raspberry Pi to resolve domain names within your VPC:
- Install Bind9:
sudo apt install bind9. - Configure the
/etc/bind/named.conf.localfile with your zone information. - Restart the Bind9 service:
sudo systemctl restart bind9.
Optimizing Performance
Improve the performance of your Raspberry Pi VPC network by:
- Upgrading to a faster SD card or SSD for storage.
- Using a powered USB hub for additional peripherals.
- Disabling unnecessary services and processes.
Conclusion
This Raspberry Pi VPC network tutorial has provided you with a comprehensive guide to setting up and managing your own VPC network. By following the steps outlined above, you can create a secure and efficient environment for your IoT devices or home server setup. Remember to regularly update your software and apply best practices to ensure the longevity and reliability of your network.
Feel free to share your experience or ask questions in the comments section below. Don't forget to explore other tutorials on our website to further enhance your skills in networking and cloud technologies. Happy building!
Data Sources: